Winter sowing in jugs: plan a four-container project
Use four recycled containers to learn the method without turning a seed experiment into a crowded spring nursery.
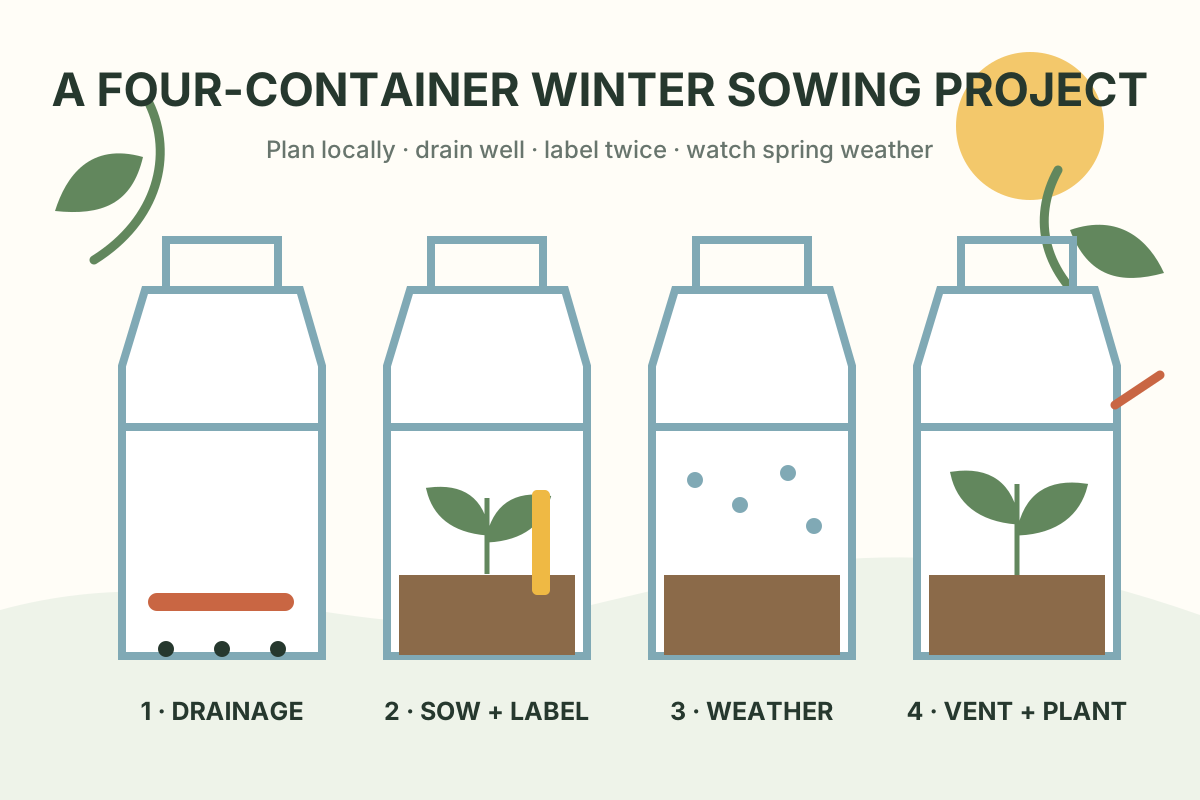
Winter sowing uses a covered, vented container outdoors as a small protected nursery. Rain or snow supplies moisture, natural cold can satisfy the needs of some seeds, and seedlings emerge as weather becomes favorable. The method is inexpensive, but it is not simply “put any seed in a milk jug in November.” The crop, climate, container, drainage, and spring follow-through all matter.
A four-container trial is large enough to compare plants and small enough to inspect in a few minutes. Planning it now gives you time to save clean containers, choose locally suitable seed, and mark a realistic sowing window. In many climates, the actual sowing belongs in winter rather than early November.
What winter sowing does—and does not do
The jug moderates wind and brief temperature swings while admitting light and precipitation. It is not a heated greenhouse. Seeds and seedlings still experience local outdoor conditions, so tender warm-season crops can be damaged by cold and may be poor choices for a first trial.
Some perennials germinate better after a period of moist cold. Hardy annuals and certain cool-season vegetables may also fit outdoor container sowing. A packet that says “cold stratify,” “sow outdoors in fall,” “hardy annual,” or “self-sows” gives you a useful clue, not automatic permission. Confirm the species, local timing, and transplant plan.
Choose four seeds with four clear jobs
For a useful experiment, do not fill all four containers with the same unknown seed. Give each jug a role:
- One locally native perennial recommended for your site and requiring or tolerating moist cold.
- One familiar hardy flower whose packet supports outdoor or cold-season sowing.
- One cool-season edible that your local Extension service recommends for your planting window.
- One comparison container—a second variety or a repeat of the seed you most want to succeed.
Avoid invasive plants and wild-collected seed of uncertain identity. If you rent, plan where the seedlings can legally and safely grow before you sow them. A balcony gardener may need only a few transplants, so a light sowing is more practical than an entire packet.
Build each container for drainage and ventilation
Translucent one-gallon jugs are common because they admit light, provide headroom, and are easy to hinge. Other food-safe translucent containers can work if they are deep enough for roughly three to four inches of potting mix and can drain freely. Clean off residue before use.
- Wash and rinse the container. Remove the cap; the top opening provides ventilation and lets in precipitation.
- Make four to six drainage holes in the bottom. Water must be able to escape even when the container sits on a flat surface.
- Cut around the jug below the handle, leaving a wide uncut hinge. Use a stable work surface and a tool you can control; keep hands out of the cutting path.
- Add about three inches of moist, well-draining potting mix. Do not use dense garden soil.
- Sow at the depth and spacing on the packet. A crowded surface produces tangled seedlings and more spring work.
- Close the jug and secure the seam with weather-resistant tape, leaving the cap off.
Do not rely on a gravel layer to fix poor drainage. Open holes and a suitable container mix do the real work. If a jug collects standing water after a storm, improve drainage promptly rather than waiting for seeds to rot.
Label twice because winter erases clues
Sun, moisture, and freeze-thaw cycles can fade ordinary marker. Put a weather-resistant label on the outside and a backup label inside or on the bottom. Record the common name, botanical name when known, variety, sowing date, and source.
Keep the seed packet or photograph it. The packet preserves germination notes, maturity timing, and supplier information that will matter months later. This also makes it easier to distinguish slow germination from a failed batch.
Place jugs where weather can reach them
Set the containers outdoors in a sunny, protected area where rain and snow can enter through the opening. They should not sit under a solid roof, in a deep rain shadow, or where a downspout can flood them. Avoid heated walls, dryer vents, and pavement that creates an unusually warm pocket.
Group the four jugs in a shallow crate if wind is likely to move them, but do not block drainage. Keep them accessible; a system that disappears behind stored furniture will be hard to monitor in spring.
The spring work is ventilation, moisture, and timing
Winter sowing reduces indoor equipment, not observation. As sunlight strengthens, a closed jug can become much warmer than the surrounding air. Check containers more often once seeds germinate.
- Vent on warm days. Open the hinged top or widen the opening so seedlings do not overheat.
- Protect during reversals. Close the top or move the crate to a protected unheated spot if a hard freeze threatens tender new growth. Match protection to the crop’s hardiness and local forecast.
- Check moisture. The mix should stay evenly moist, not saturated. Add water gently when precipitation has missed the container and the surface is drying.
- Increase exposure gradually. Open the container for longer periods as seedlings strengthen. This transition is a form of hardening off.
- Transplant at a manageable size. University of Maryland Extension suggests separating seedlings when they have true leaves and are around two inches tall, while crop and weather still determine the final date.
Use this four-container project log
Below the grid, note the container location, number of drainage holes, mix used, first germination date, and every day you begin venting. Those details turn one season into a better plan for the next.
Troubleshoot the container, not just the seed
| What you see | Likely check | Useful response |
|---|---|---|
| Standing water or green, soggy surface | Blocked or insufficient drainage | Clear or add bottom holes; move away from runoff |
| Dry mix while surrounding ground is wet | Jug sits under cover or opening is too sheltered | Reposition it; water gently and recheck placement |
| Long, pale seedlings | Too little light, too much warmth, or overcrowding | Increase appropriate light and ventilation; thin carefully |
| Wilt on a sunny spring afternoon | Heat or drying inside the jug | Vent immediately, check moisture, and shelter from extreme afternoon heat |
| No germination | Species timing, seed viability, depth, or moisture | Check the packet and records before discarding; some perennials are slow |
Three questions beginners ask
Should the cap stay on?
Leave the cap off unless current local guidance for your particular container says otherwise. The opening releases heat and admits moisture. It does not replace bottom drainage.
Can the jug freeze solid?
Seeds selected for natural cold exposure can tolerate winter conditions appropriate to that species, but waterlogged media creates a separate problem. Freezing is not a reason to omit drainage. Tender seedlings that emerge before a severe reversal may need protection.
When should I open the jug?
There is no single date. Begin active ventilation when seedlings are up and sunny days warm the container. Respond to conditions: open more in warmth, protect during hard cold, and work toward full exposure before transplanting.
Store unused seed with the method in our winter seed-storage guide. If four groups of seedlings already exceed your available planting space, use the small kitchen-garden plan before sowing. The most useful project is one with a prepared destination.
Sources
Reviewed November 4, 2026. Local climate and species guidance should determine sowing and transplant dates.
- University of Minnesota Extension — Jug it and grow: winter sowing for pollinator gardens.
- University of Maryland Extension — All the Dirt on Winter Sowing.
- University of Missouri Extension — Winter Sowing Seeds.
- Penn State Extension — Starting Seeds in Winter.
Questions about caps, drainage, frozen containers, spring ventilation, and tender crops were also reviewed in public gardening discussions; recommendations above rely on Extension guidance.